How to make the net for removing filamentous algae
Parts
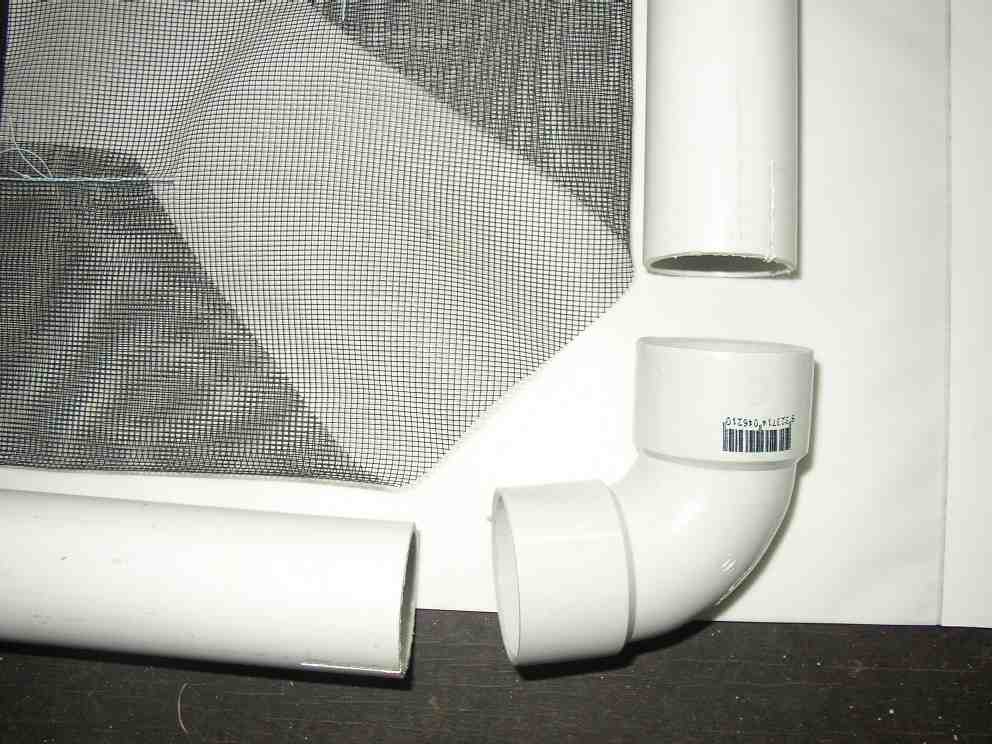
3 m of 40 mm dia DWV PVC pipe
4 of elbows for 40 mm DWV PVC pipe.
Tools
Hacksaw
Deburring tool or half-round file
20 mm holesaw
Electric drill (for holesaw)
Tape measure
Permanent marker pen (fine)
Sewing machine
Scissors
Chalk
Dressmaking pins
Method
Cut and deburr four 700 mm lengths of 40 mm DWV PVC pipe.
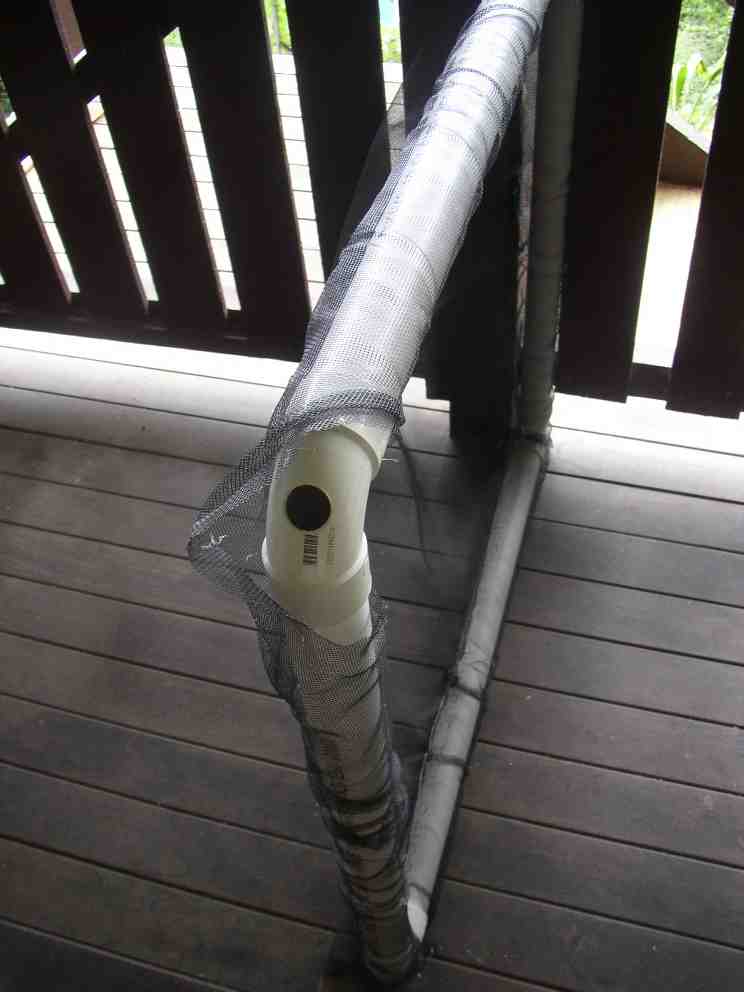
Use a 20 mm holesaw to cut air/drainage holes in the outside centre of the four 40 mm elbows. Also cut 20 mm holes at the middle of each 700 mm length of pipe. Cut these holes right thru, i.e. in one side of the pipe and out the other (or cut two holes from opposite sides if your holesaw won’t go right thru). Deburr these 12 holes. Blow or wash all parts, inside and out, to remove plastic chips and dust (they look unsightly floating around in your pond).
Do a trial assembly of the PVC parts into a square. Do not use any glue (we don’t use any on final assembly either). Push all elbows half way on before trying to push any one of them fully home. This can be checked by looking, or feeling, through the holes in the elbows.
If you have 85 degree elbows (as opposed to 88 degrees) you may need to relieve some of the bending tension by using a hacksaw to cut a slot about 10 mm long at each end of each piece of pipe. These slots must go to the outside of the square so they must not be cut in line with the 20 mm holes in the pipes, but in line with a point halfway between the holes, and the two slots on a pipe must be in line with each other.
When you are able to push them all fully home without undue bending tension, diassemble them (although one elbow can be left attached to each length of pipe).
Cut a 1200 mm length of 1200 mm wide fly-screen, if it isn’t already cut to size. If it’s really four feet wide (1220 mm) then cut it 1220 x 1220 mm. Fold it on a diagonal to see where to cut it.
Cut the corners off this square of fly-screen at 45 degrees, starting 300 mm from the corner, along an edge. Chalk is good for marking it. You can just measure one corner and cut all four corners at the same time by folding it into quarters (or eighths). It should end up being an octagon with four sides of about 600 mm, and every other side about 425 mm.
Mark a line with chalk 200 mm in from a long side. Fold the side to this line and pin it with at least 5 dressmaking pins placed about 30 mm from the line. Do this for all four long sides.
Set the sewing machine for a 2.6 mm straight stitch, standard tension.
Sew each sleeve about 10 mm from the chalk line. Start sewing in reverse, about 30 mm from the start of the overlap, and when you’ve backed up to the start, change to the forward direction and sew over what you’ve just done and continue for the full length of the sleeve. When you get to the other end, go into reverse again and back up about 30 mm. These double-backs at the start and finish are so the stitching can’t pull apart at its free ends. Cut the threads about 10 mm from the end of the stitching. Remove the pins from each sleeve after you’ve sewn it. Do this for all four sleeves.
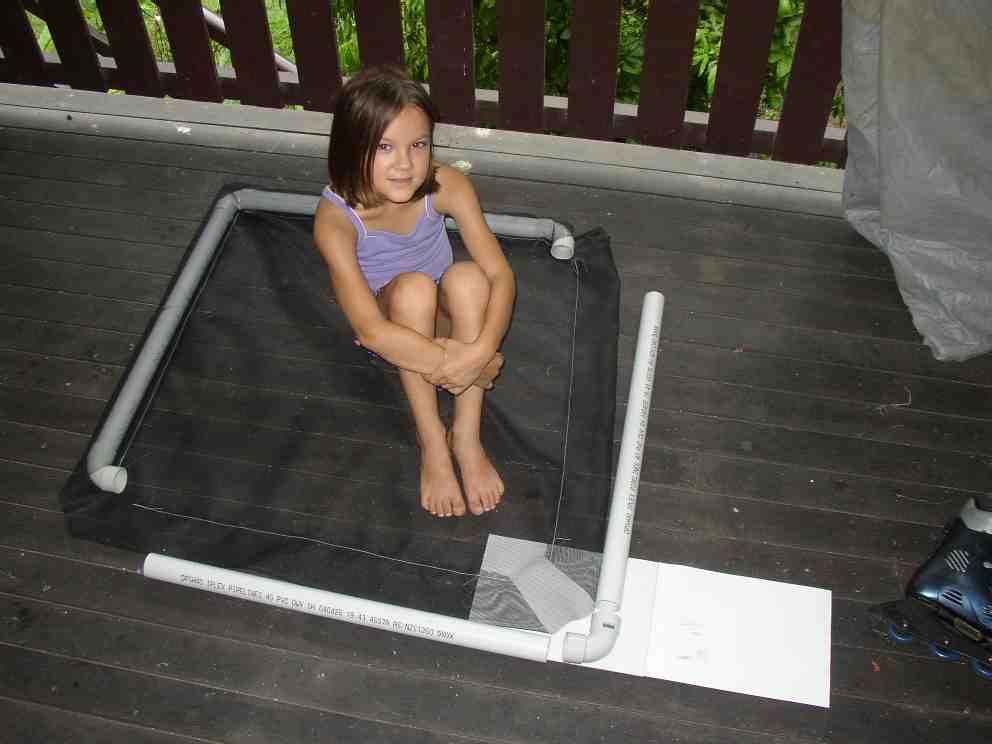
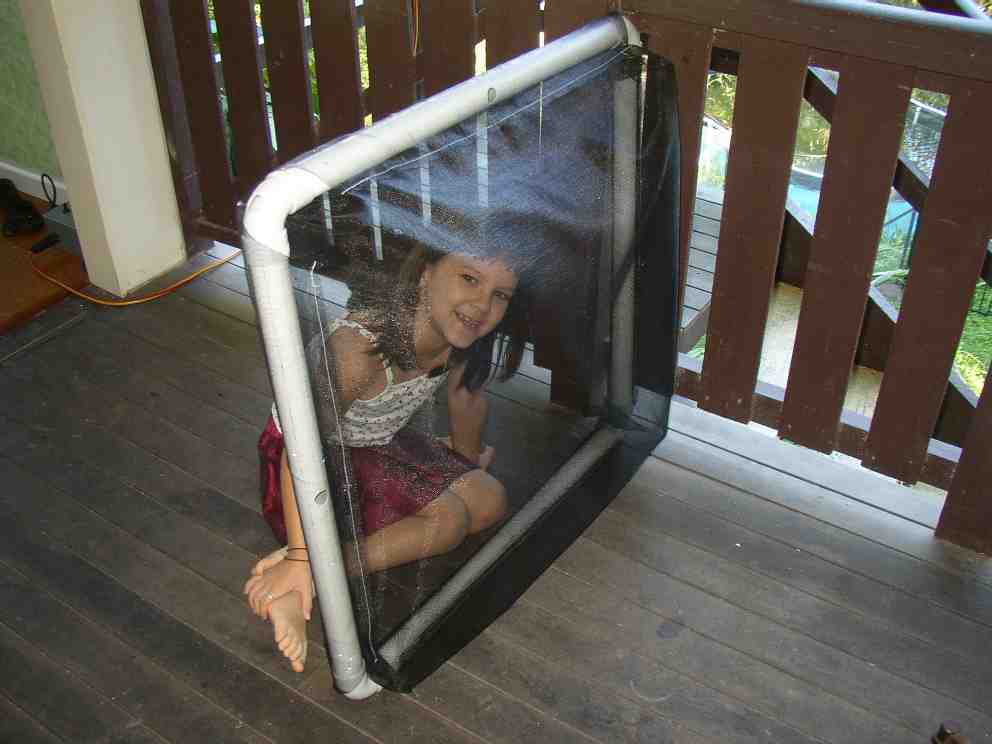
With the fly-screen laid out on the floor, slide the four 700 mm PVC pipe lengths into the four sleeves. Join them together with the four elbows. Do not use any glue. Ensure that the holes in the pipes are facing up and down and any slots are to the outside of the square. Push all elbows half way on before pushing any one of them fully home. Be careful not to pinch any fly-screen in the joints. Push them all fully home. This can be checked by looking, or feeling, through the holes in the elbows. The net is finished.
How to use the algae net
First decide where you will dump the algae, just outside the pond. You should be aware that, although the filamentous algae (typically Spirogyra) is quite innocuous while it is in the water, as soon as it is removed from the water, parts of it begin to decompose rapidly and in an hour or so it gets a mild "fishy" smell (actually more like the smell of rotting seaweed on a beach) that some people find unpleasant, which lasts for a few days. So I suggest putting down a large drop-sheet of some kind, just outside one end of the pond, so the algae can be dumped onto it and later carried to a composter or a more distant part of the garden.
Turn off the pump(s) and use a pool wall-broom to set the filamentous algae adrift. Starting at the end with the drop-sheet, stand or crouch in the water and position the net in front of you, holding it by two vertical sides. Walk slowly through the water, pushing the net in front of you. When nearing the other end, do a wide U-turn (so as not to lose anything from the net) and then walk back along your original path (to take advantage of the current you set up on the way down). Repeat this until the net feels noticeably harder to push (which may be after a single pass the first few times).
When nearing the end with the drop-sheet, bring the net slowly up into a horizontal position at the waters surface. Check that you haven’t caught anything that you don’t want to lose, such as a fish or floating plant. It’s rare to catch a fish by accident. Unless they are sick, they tend to keep out of the way. Don’t worry about tossing out water-boatmen and back-swimmers. They can fly quite well once they dry their wings. They prefer to do it at night, when the clever blighters swim up and out of the water and land on their feet on the water surface like water-striders, to dry their wings before taking off.
Note that backswimmers are similar to waterboatmen but they swim on their backs. Waterboatmen can’t bite humans, but backswimmers can give a painful bite (like a March Fly) if you try to handle them, although it is quite safe to swim with them.
Lift one side of the net onto the edge of the pond and lift the opposite edge slowly above the water surface as the water drains out of the holes in the frame, then continue lifting until the net is vertical, resting on the edge of the pond. Hold the top with one hand while giving the mesh a quick flip to make most of the algae fly out of it and onto the drop-sheet. Then lower the net back into the water and start again. It doesn’t matter if you don’t get all the algae off the net each time, so long as you always lead with the same side of the net.
When you’re happy with the water clarity (no need to be too fastidious), take the net out of the pond and hose off all the algae before storing the net. Then bundle up the algae in the drop sheet and empty it into a composter, or on a garden bed away from the pond and house. Then hose any remaining algae off the drop sheet before hanging it up to dry. Turn the pump(s) back on. You’re done.